Tips and Tutorials
The Blogging Process: Stationery
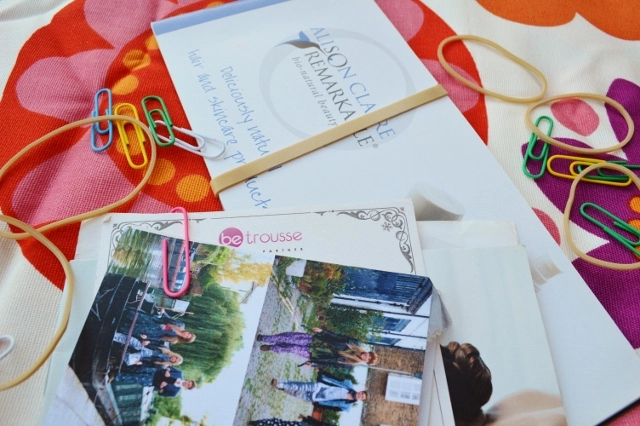
1For me, blogging is so much more than just sitting down with my laptop and reeling something off in a few minutes. It involves planning, making notes when the moment strikes, drafting, taking and editing photos, organising my time, and of course, writing and publishing the final post! Over time I’ve noticed that I’ve hoarded quite a lot of stationery to aid these stages, so I thought I’d share with you my stationery essentials for the process of blogging.
Notebooks and Pens
As a writer, and an Academic Support Worker, I always carry notebooks and copious amounts of pens with me at all times, as I need them for my work. But I have special notebooks that are dedicated to just blogging. I carry a little one with me in my handbag so I can make notes when I’m inspired whilst out and about, and I use a bigger one at home to roughly draft post ideas, make lists of upcoming posts, and doodle nail art designs etc.
Sticky Notes
I use sticky notes a lot when I need to remind myself of something, such as sending invoices or replying to PR emails. My notebooks and bedside table are covered in them!
Highlighters
I love to have a highlighter or two handy so I can highlight important points in press releases. It just makes getting all the relevant information into a post that little bit easier!
USB Stick
After 3 years my laptop is well and truly on its way out, so just to be safe I like to back up my blog posts and photos on a USB stick. That way they’re portable too, so I can organise posts on someone else’s computer or laptop if needs be.
Paper Clips and Rubber Bands
Not an essential, but I like to be organised, so I use these to keep press releases neatly together!
After all this planning and prepping, I like to settle down on the sofa with my laptop and a cheeky chocolate treat, and type away whilst I have something good on TV in the background.
What are your stationery must haves for blogging?
Naomi x
*This stationery was sent to me on behalf of Viking Direct for review purposes. All opinions expressed are honest and my own.*
How to Make Money on eBay
2I’ve been selling on eBay for years and I’ve noticed that, over time, it has become increasingly more difficult to actually make any money from the things you sell. With postage costs rising, PayPal and eBay both taking fees, and the sheer volume of items for sale, if you’re not a savvy seller, selling on eBay can take a lot of effort with very little pay-off.
So, today I thought I’d share with you all my tried and tested tips and tricks for making money on eBay, with a few of my own success stories thrown in too. I can’t promise you’re going to make a fortune if you take my advice, but you can at least earn a few extra pounds!
1. Use Keywords
The words you use in your titles can really influence how many people are finding your item when browsing eBay, and therefore how many people are bidding. Say you’re selling a black dress… Calling it ‘Black Dress’ will probably mean it gets lost amongst a whole host of generic black dresses, but if you add detail with fashion keywords you can really tailor your items, especially if you know what’s on trend at the moment, and what people will likely be looking for. In my experience, popular terms include ‘Boho’, ‘Gothic’, and ‘Biker’. Just make sure your item actually suits the trend you are advertising it as!
My Success Story: I recently purchased a faux leather jacket on eBay that, though it was nice and very on trend, really didn’t suit me. I only paid £2 for it, so I put it back on eBay at a similar price and would have been happy just to make my money back. However, I listed the jacket using a few keywords in the title that related to its style (such as ‘biker’, ‘punk’ and ‘goth’), and in the end the jacket sold for more than £16!
2. Go Charity Shopping
One of my favourite ways to make money on eBay is to go shopping myself first… If you’re willing to spend time hunting, you can come across some real designer gems in charity shops at low prices, that you can then sell on when you’re done with them. You won’t find something every time you look, but when you’re lucky it’ll be worth it.
My Success Story: A couple of months ago, whilst browsing a local charity shop, I came across a men’s t-shirt from Liam Gallagher’s ‘Pretty Green’ range of clothing. It looked brand new, and at £2.99 it felt too good to be true, but I checked the labels over and discovered that it was 100% genuine. I snapped it up with the intention of giving it to my partner but he didn’t want it, so again, I put it on eBay at a low price in the hope of making my money back. Within hours the t-shirt had gained lots of watchers, and by the end of the seven-day listing it sold for a whopping £23.
3. Take Advantage of Free Listing
If you list an item for under 99p, eBay allow you to list 100 single-quantity items per month for free! But if you want to charge more (as I suggest in tip 4) it costs, and the higher your starting price, the more it costs. For clothing it’s usually around 15p per item, which doesn’t seem that much, but if you’re listing several items at once it soon adds up! Paying to list items just eats into your profits, so take advantage of free listing days whenever you can. eBay tend to run a free listing weekend every other week, so I tend to prepare everything during the week (gather items, take photos, plan my listings etc), then list everything during a free listing weekend.
4. Factor in Fees
Unfortunately for us sellers, both eBay and PayPal take a percentage of the sale price of your items, including from what you charge for postage. PayPal take between 1.4% and 3.4%, plus an extra 20p, and eBay take 10% of the final value. So, if you actually want to come out of a sale with something other than a few pence, it’s a good idea to factor these fees into your pricing. I personally never list anything for 99p, because once all the fees have been taken away you’re left with next to nothing, so I tend to start items a little higher. Perhaps £1.49 for small items, or for labelled brands a bit more.
It might also be an idea to up your postage costs too. It costs £2.60 to post a small parcel in the UK, but if you charge £2.60 you’ll end up paying some of the postage out of your own pocket, as some will be taken in fees. I usually put mine up to around £3.00 as P&P does also include packaging!
5. Take Good Photographs
Ever found something interesting on eBay, only to find there’s one small, low quality image of the thing, probably taken on a mobile phone in a badly lit room? Chances are you’re not going to want to bid on something if you can’t see what it looks like, so good photographs are always important in making a sale! I like to take mine with a digital camera rather than a phone, in natural light, and I always include a few close up photographs too so buyers can really see what they’re getting.
Do you have any tips for selling on eBay? Please comment if you do as I’d love to hear them!
Happy selling,
Naomi x
Chocolate Treat Week: Makeup
8My third Chocolate Treat Week post is all about make up. Believe it or not, I had to search high and low for chocolate scented and coloured make up products, but I found a couple of great ones in the end. I’ve also created a yummy eyeshadow look to share with you, which uses three different shades of chocolate brown. Enjoy!
For Lips… Palmer’s Dark Chocolate & Peppermint Lip Butter
In my high and low search for chocolate lip products I discovered a myriad of chocolate lip balms, but none of them seemed to cut the mustard as a gloss, rather than just a protective balm. In all honesty I was close to giving up, but then I found this… Palmer’s Dark Chocolate & Peppermint Lip Butter.
The Lip Butter has a lovely creamy formula which feels amazing on the lips. You can tell from how it feels that it is intensely enriching, and because it’s a butter and not a gloss it feels smooth and moisturising rather than sticky. It is also light in colour so doesn’t leave a tint on the lips, but as the packaging states it adds a ‘subtle gloss’, which is what makes it makeup in my eyes. The glossy shine it adds lasts for a long time, and can be worn over lipstick as well as directly on the lips.
The minty chocolate scent of the Lip Butter is absolutely divine. The fact that it is dark chocolate means that it isn’t too sickly sweet, and the freshness of the peppermint gives it a sharp edge. The mint also feels wonderful on the lips as it gives the lip butter a pleasant tingle. Though it doesn’t claim to be a plumping product I think it does have a slight, natural-looking plumping effect, but without the pain that some plumping glosses can cause!
Palmer’s Dark Chocolate & Peppermint Lip Butter definitely does what it says on the tin. It ‘softens & soothes lips’ almost instantly and leaves them feeling protected, but it has a big advantage over most lip balms by adding that ‘subtle gloss’. The Lip Butter is available in lots of high street shops (there’s a list here), and usually retails for about £2.75, which is an excellent price considering it is a gloss AND a protective balm in one.
For Eyes… MUA Malt Chocolate Intense Glitter Eyeliner
MUA’s Malt Chocolate Intense Glitter Eyeliner is another quality MUA product. Like all of their glitter liners it costs just £1, which is outstanding value as there’s even a pencil sharpener incorporated into the lid! The eyeliner is very creamy so it applies like a dream to both your waterlines and your upper and lower lash lines without pulling the skin at all. The glitter is very fine too, so it adds a lovely shimmer without causing any irritation or heaviness on the eye.
Malt Chocolate is a pretty, highly pigmented shade with a bronze tinge to it, which gives it that ‘intense colour finish’ – far from the dull, uninspiring look of most brown eyeliners! What I like about this liner is that, once it dries, it doesn’t smudge and it lasts a good long while before it comes off, keeping its bold colour for the duration of wear.
The eyeliner is also impressively versatile. MUA state that it can be worn all over the eyelid, as a lip liner or as an all-over lip colour as well as an eyeliner, and due to its creaminess I think it would make a great lip product as it wouldn’t be drying at all. What a fab thing to throw into your suitcase for a holiday or into your clutch on a night out!
If you’d like to try any of MUA’s Glitter Intense Eyeliners they are available in Superdrug stores or online here.
Create the Look… Triple Chocolate Eyes
The above look was created using three different shades of chocolate coloured eyeshadow. MUA’s Chocolate Box Trio Eyeshadow would be perfect for this, but I actually used their Immaculate Collection Palette. All you need to use to copy this look is a white chocolate shade as a highlighter, a milk chocolate shade as your main colour, and a dark chocolate shade for shadows and creases. The shades I used from the Immaculate Collection were these…
- White Chocolate: Shade 12
- Milk Chocolate: Shade 23
- Dark Chocolate: Shade 21
And here’s how you get the look:
- Prepare your eyelids right up to the brow bone with your preferred eye primer.
- Apply your milk chocolate shade to your eyelid using a flat eyeshadow brush, from corner to corner and up to the crease.
- Using another flat eyeshadow brush sweep your white chocolate shade above the milk chocolate shade, up to the brown bone.
- Using a shading brush, apply the dark chocolate shade along the crease of your eye, thickening the line at the outer corner and taking it down to the corner of your lashes.
- Blend the dark chocolate shade into the edge of the milk chocolate shade with a clean eyeshadow brush.
- Using a fine brush, apply a small amount of the white chocolate shade to the inside corner of your eye and a third of the way under your lower lash line. Fill in the rest of your lower lash line with the dark chocolate shade.
- Brush any loose eyeshadow from your face using a clean brush and finish with a generous coat of your favourite mascara, preferably brown.
The Last Rolo…
The Last Rolo is where I hand over the last few words of each Chocolate Treat Week blog post to another blogger. In the run up to Chocolate Treat Week I asked five of my favourite bloggers a couple of questions about their favourite chocolate treats, and today’s answers come from Claire of Nocturnal Beauty.
Can you recommend any chocolate scented, flavoured or themed beauty/fashion products?
I can definitely recommend the Whipstick lip balm from Lush. It’s my by far my favourite chocolate scented product that I’ve tried. It smells just like chocolate orange, and it isn’t overly sickly or too sweet, it smells absolutely divine. I do catch myself smelling the tin quite a lot! It feels lovely too and leaves a bit of a brown tint to the lips. It’s perfect for anybody who loves chocolate!
What is your favourite chocolate treat to eat, and why?
My favourite chocolate treat to eat is probably chocolate cake. I eat far too much cake and it’s a wonder I have any teeth left. I also make some seriously good chocolate fudge!
Thanks for reading today’s Chocolate Treat Week installment! Please check back tomorrow for a post all about chocolate themed nails, featuring some new nail art!
Naomi x
What To Take On Your Mini Break
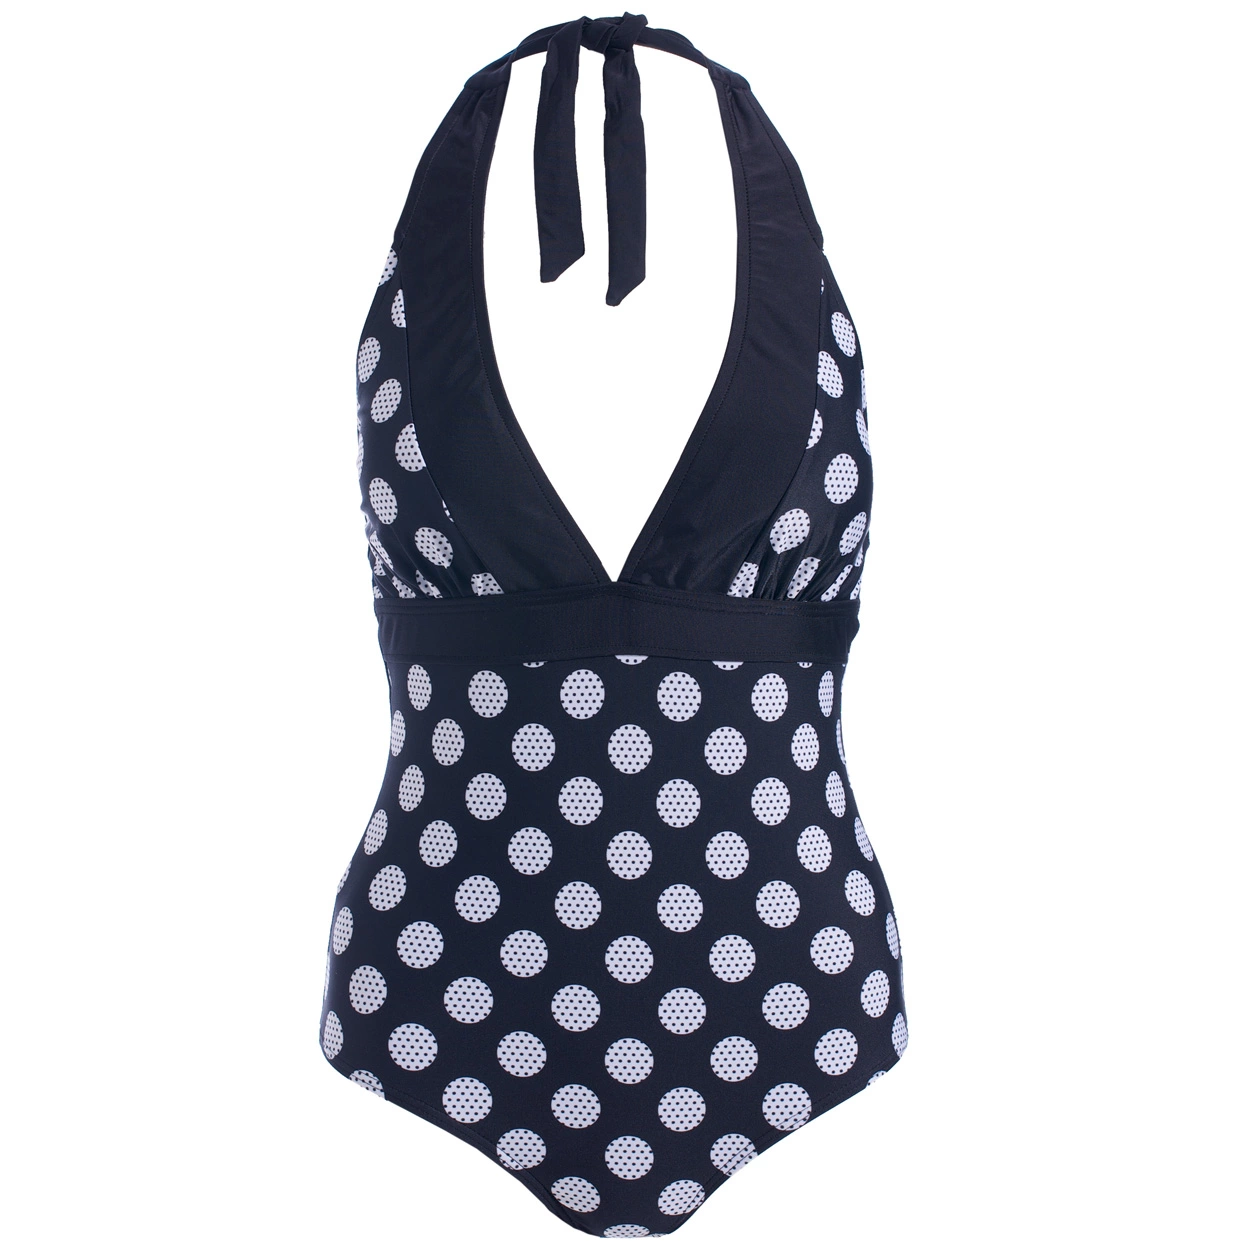
10Summer is slowly coming to an end, but there’s still time to dash off into the sun for a last-minute relaxing mini break. You’ve got your clothes sorted… Bikini? Check. Sun dresses? Check. Something gorgeous for the evening? Check, and you’re almost good to go, but there’s always the question of what toiletries and cosmetics to take, and what to leave behind. If you packed all the big bottles and endless tubes of lotions and potions that you usually use then you’d need another suitcase, am I right? So, in the name of making life easier for us all, I thought I’d take the opportunity to narrow everything down and come up with ten little solutions to this bulky problem, which will leave plenty of room in your case for your beach reads and novelty souvenirs – you can thank me later!
1: Basic Make Up
Vanity cases and make up bags stuffed full of make up are impractical and unnecessary when travelling. This might sound ridiculous, but all you need to take with you for a fresh-faced summer make up look are five basic items – foundation, eyeliner, mascara, lip gloss and blush. That’s it! Don’t believe me? Check out my Top 5 Summer Make Up Essentials post for proof that that’s all you need.
2: Nail Varnish
If you can’t afford or don’t want an expensive salon manicure before you go away then it’s a good idea to pack a bottle of nail varnish. You never know when you might be invited out last-minute for a romantic meal or an evening at a bar, so choose a quick drying varnish that you can slick on in seconds before you leave.
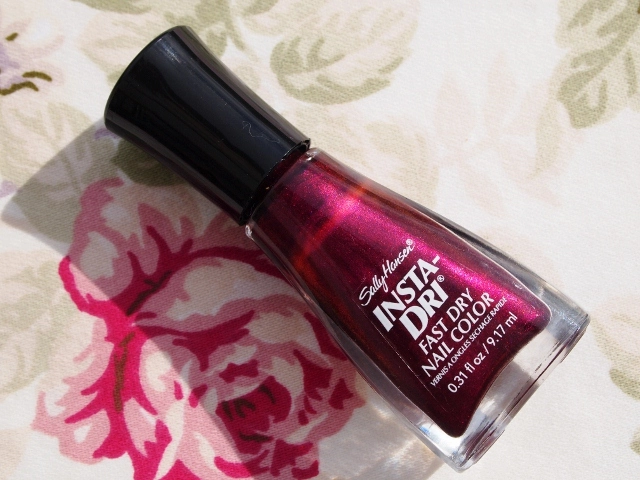
I highly recommend Sally Hansen’s Insta-Dri Nail Colour in ‘Ruby Rush’. It’s a deep, classic shade that will go well with any outfit, it has a wide brush for quick, even coverage and it is dry to the touch in just minutes. It’s wonderfully chip resistant too, and a new favourite of mine.
3: Make Up Remover
If you’re like me, you probably have a bottle of make up remover for your eyes, one for your face, and a big bag of cotton wool balls and cotton buds that you use them with. That’s a lot of bottles and bags to take on one little trip! A great substitute to use for the few days you’re away are make up remover wipes, as they save space, are quick to use and can be thrown away once you’re done with them.
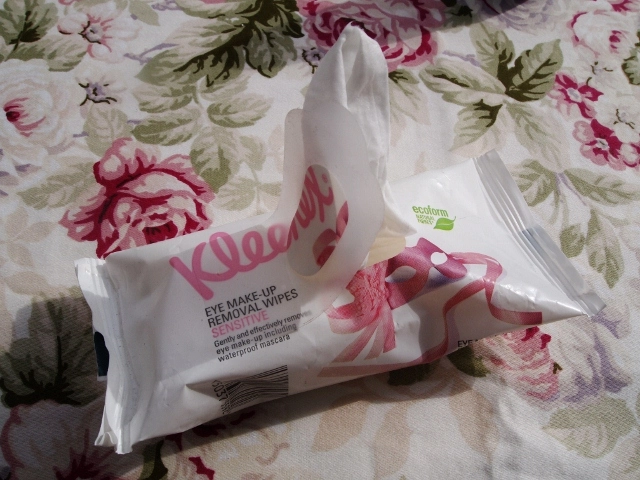
Kleenex recently brought out a range of make up remover wipes which are made of natural fibres and are gentle on the skin, yet very effective. The ones pictured are specifically for eye make up, but they also make facial cleansing wipes.
4: Sun Lotion
Ever noticed that sun lotion tends to come in huge bottles that you’ll never get through during a two-week holiday, let alone whilst on a mini break? Well, Hawaiian Tropic have solved that problem with their handy 100ml bottles of sun lotion! They still contain the gorgeously scented, high quality lotion that the big bottles do – they’re just lighter and more compact, and the perfect size to carry in even the smallest of bags.
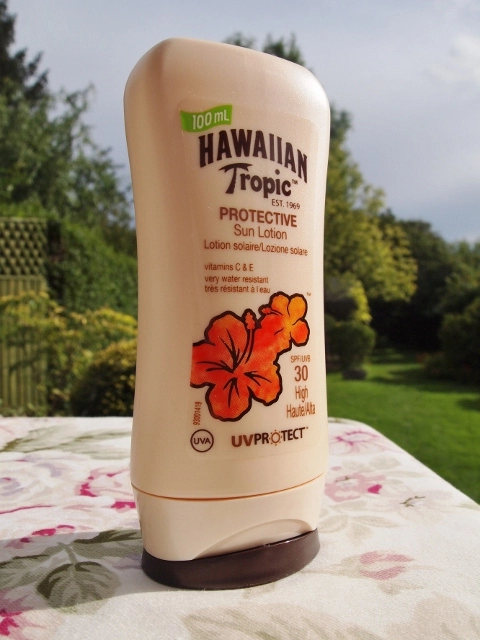
I’ve been using the Hawaiian Tropic Protective Sun Lotion SPF30 and I adore it. The lotion not only protects your skin but softens it too, as it contains vitamins C and E, and is gorgeously light and silky. It’s also ‘very water resistant’, which is great if you fancy a swim in the sea, but it’s still a good idea to apply it regularly to stay as safe as possible. At £5.49 these mini bottles are a real steal.
5, 6 and 7: Moisturiser, Shampoo and Shower Gel
Now is a good time to raid your old beauty boxes, gift sets and collections of product samples. All those little bottles and sachets of moisturiser, shampoo and shower gel that you never thought you’d use are actually the perfect size for taking on mini breaks! Not only do they save space, but you might also discover a hidden gem amongst them which you can repurchase and carry on using when you get home.
8: Deodorant
Rather than packing chunky spray deodorants, why not take a roll-on deodorant instead? They’re much kinder on the skin, and compact enough to carry with you.
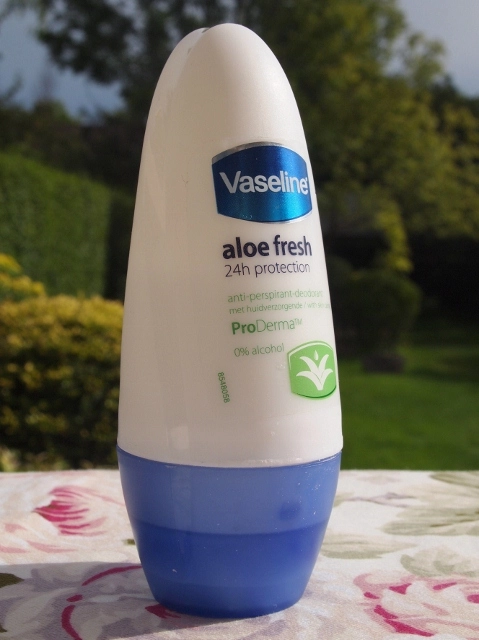
A particular favourite of mine is Vaseline Aloe Fresh 24h Protection Deodorant, as it is long-lasting, the aloe makes it extremely moisturising and refreshing, and it doesn’t leave white marks on your dark clothes!
9: Disposable Razor
You never know when you might need to neaten up whilst on holiday, but taking a bulky epilator or home waxing kit with you is far too much trouble! The solution? Take a disposable razor! Just because it’s disposable doesn’t mean it won’t do a good job, especially if you use Wilkinson Sword Extreme 3 Beauty Razors.
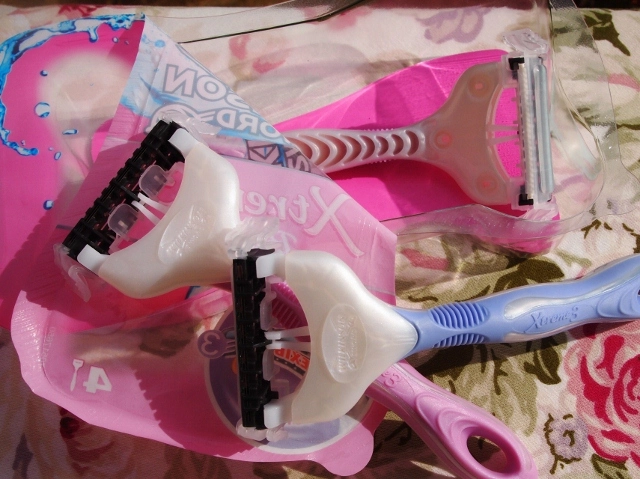
I’ve been using these myself and they give an amazingly smooth result at a fraction of the usual hair removal cost (you get four for £3.99). The three blade razor head is flexible so moves with the curves of your body for a close shave, and it even features a moisturising strip of aloe and jojoba to leave your skin feeling soft – not what you’d expect from a disposable razor at all! They look and feel more like luxury razors, but once you’re done with them you can just throw them away so they’re far more convenient for travelling with.
10: Perfume
A great way to make the transition from a lazy day on the beach to a lively evening at a bar is with a beautiful fragrance, but who wants to be carrying a big glass bottle of perfume around with them? That’s where Avon’s mini fragrances come in. Avon now sell miniature versions of their best selling perfumes which are great for top ups throughout the day or, in this case, to take with you on a short trip. You will find the full range on page 206 of Brochure 16, including 15ml Purse Sprays and 30ml Travel Sprays (how apt!), ranging from £5 to £7.50 each.
Wherever you’re going this summer, I hope these tips will help you know what to pack, and I hope you will Be Spontaneous whilst on your travels! Why not do something you’ve never done before, and then share it with the Be Spontaneous crew on Facebook? You could even win some amazing prizes in the process!
Thanks for reading,
Naomi x
*The Hawaiian Tropic Protective Sun Lotion SPF30 and Wilkinson Sword Xtreme3 Beauty Razors featured in the post were given to me by Wilkinson Sword for review purposes. Everything else was purchased using my own money. All opinions are honest and my own. Some affiliate links have been used*
A Simple Way to Create the Illusion of Longer, Fuller Lashes
6I must admit, I’ve never been a fan of false lashes. The glue really puts me off using them and I really don’t think they suit me. I much prefer more natural looking lashes, but I have no problem with adding a bit of length or volume using make up. As well as the obvious choice of mascara, there’s also another simple way to create the illusion of longer, fuller lashes, and that’s with a thin line of eyeliner. Personally I like to use gel liner as it’s easier to draw a fine, smooth line with, but any eyeliner will do.
To create this basic look I used two gel eyeliners – a black one and a purple one. With a fine brush I applied a thin line of the black liner across my top lash line, as close to the lashes as possible. This is what creates the illusion of longer, fuller lashes, as the black looks like an extension of the lashes, and the solid line makes the lashes appear fuller. If you have paler lashes or use a different colour mascara, then use an eyeliner shade at this stage which is more suited to your colouring.
Using the purple liner I then drew a thicker line above the black line, with a slight flick at the outer corners. Adding this thicker line of colour adds to the long lash illusion as it gives the impression that the lashline starts where the colour begins, thus making the black look more like an extension of your lashes. It’s up to you what colour you use – I just wanted my eyes to match my outfit. Add a layer or two of your favourite mascara and you’re good to go!
I hope you’ve all had a good weekend!
Naomi x
DIY Simple Cord Bead Bracelets
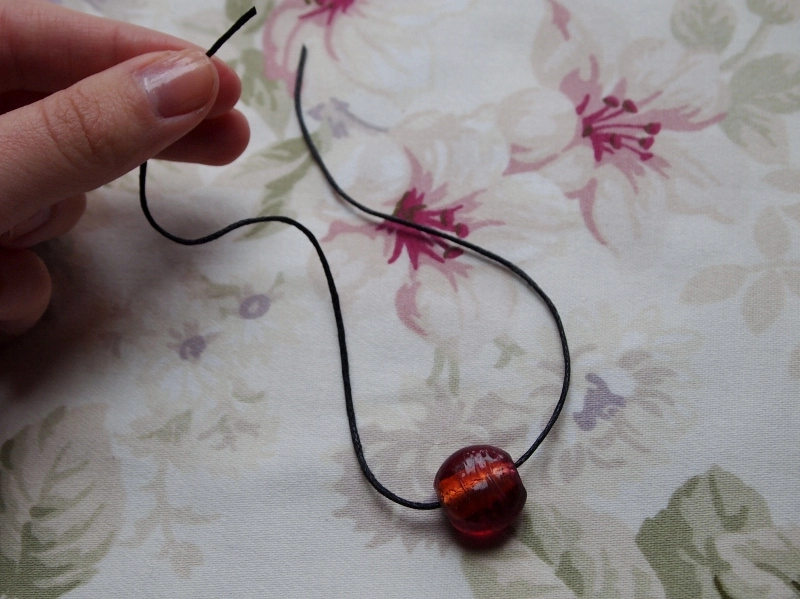
5I was recently browsing the summer sales and noticed that there were a lot of fine cord beaded bracelets around. I thought they were very cute and subtle, but I couldn’t justify spending money on what was essentially just a piece of string and a single bead. So, being the thrifty girl that I am, I decided to make my own! Under my bed I have a big box of craft stuff, so today I dug out some cord and a few beads and got making. As I went along, I took some photos so I could put together this little tutorial for you all  Each one only takes a few minutes to make so you really don’t need to set aside much time to try this out.
All you will need to make your simple cord bead bracelet is:
Leather Cord
Scissors
A Pretty Bead
And this is how you do it!
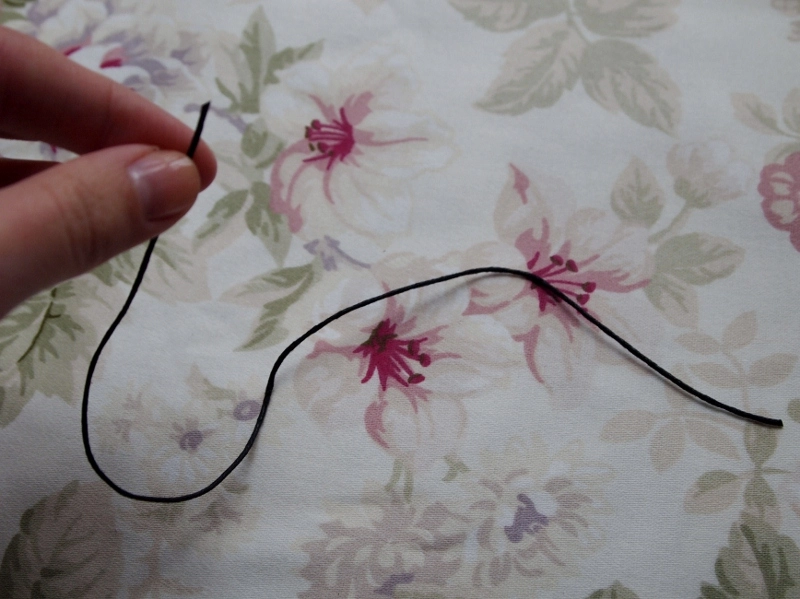
1. Cut a length of cord which is a few inches longer than the circumference of your wrist. It needs to be quite long so you can tie knots later on! Any excess can be snipped off if needs be, so try not to make it too short.
2. Thread your bead onto the cord, making sure that it’s in the centre.
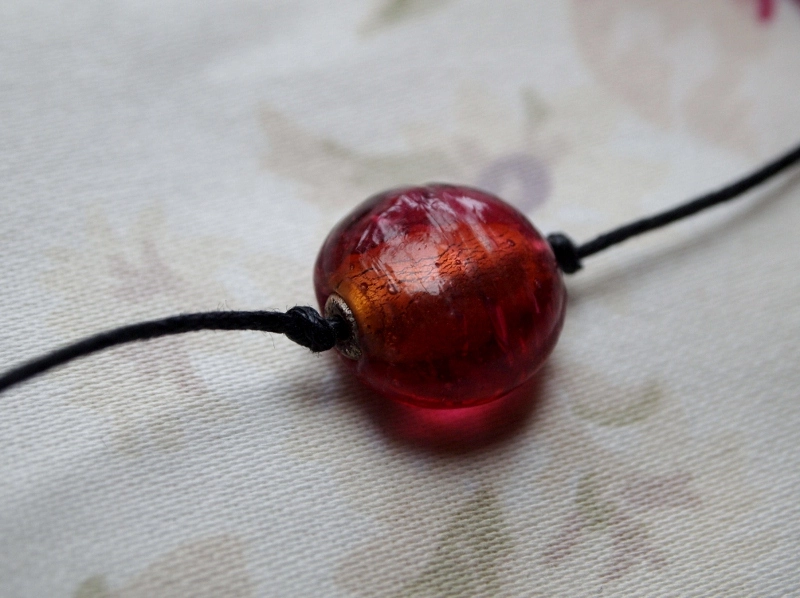
3. Tie a tight knot either side of the bead to keep it in place.
4. This is probably the most fiddly bit… Tie one side of the cord around the other side of the cord to create a sliding knot. It’s difficult to explain how to tie a sliding knot so if you don’t know how to do it, there’s a simple guide here.
5. Do the same on the other side. The sliding knots will make it easy to make the bracelet tighter or looser.
And that’s it – once you’ve trimmed it down you’re finished! I made several bracelets using different glass coloured beads so I can wear them stacked together. And here they are…
What do you think? I hope you like them! I’d love to see a photo if you decide to try this out.
Happy crafting 
Naomi x
Nail Stains – Help Me!
5Hi everyone,
Once again I have been very busy lately. I have my final postgraduate assignment for this year due in on Wednesday so I have been working really hard on that over the last few weeks. On top of that, there have been birthdays and family emergencies galore this week, leaving very little time for anything else! So, this is just a quick plea for help from me today, and I hope one or some of you can help me!
Earlier this week I applied nail varnish without putting on a base coat. I’ve done this before and my nails were fine, but the nail varnish I used was given to me by somebody who had purchased it whilst on holiday abroad, so it may have had some funny stuff in. For the first time EVER I have very stained nails  They’re all yellow and the stains cover pretty much all of every nail – it looks horrible! I was just wondering whether any of you have any hints or tips on how to remove, or at least minimise, stains on nails? I have looked online and there all sorts of ideas out there, but I want to try something that works!
So, if you’ve got any tried and tested methods, please leave a comment below. Thanks so much in advance! I’ll see you all tomorrow with another Montagne Jeunesse review.
Naomi x


