Posts tagged Design
Personalised Canvas by CanvasDesign
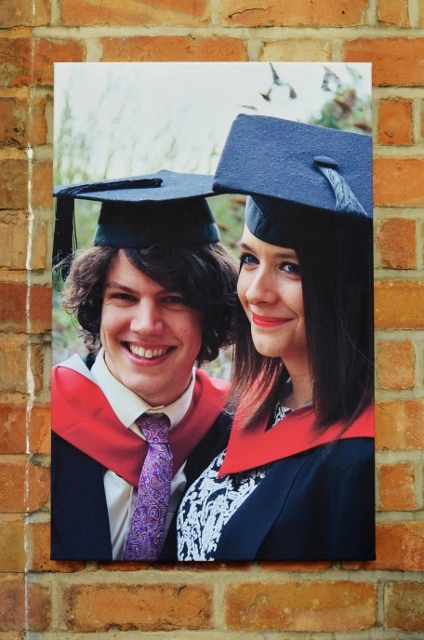
0A couple of weeks ago I noticed on Twitter that canvas printing company CanvasDesign were looking for bloggers to review one of their canvases. I immediately got in touch as I’m hoping to move in with my fiancé soon, and am currently looking for nice things to hang on our walls, and this seemed like the perfect opportunity! CanvasDesign were happy to send me a canvas, and I knew exactly what I wanted it to have on it… My favourite photo of my fiancé and I taken at our recent Masters graduation.
CanvasDesign asked me to send them a high quality image (around 500KB), so I did, and within 48 hours the canvas was on my doorstep. I have to admit, I was VERY surprised when I received the canvas as the packaging was HUGE, which I wasn’t expecting, and I was lucky enough to be sent a massive 30″ x 20″ canvas. And it is beautiful.
The quality of the canvas is very high as it is made from 100% cotton, and it comes on a solid, sturdy pine frame. The back is also nicely finished, and looks incredibly neat and professional, and the image hasn’t suffered at all from being enlarged. Rather, it looks clear and vibrant.
A portrait canvas of this size usually costs just £29.99, which is ridiculously cheap, especially considering the cost of graduation photography prints! It was well over £50 for a standard pack at my graduation, which I couldn’t afford, so I’m so pleased that I now have this memento of the day. So, if you have a relatively good camera, and a friend or relative who’s good at photography (my dad took this picture), using CanvasDesign would be a great way to save money on photos of special events. Imagine how lovely a wedding, anniversary or new baby photo would look on a canvas like this!
Overall, I am so, so happy with my canvas. I can’t get over how big it is, the quality is amazing, the service was spot on, and I even got a free hanging kit with my order. I love my canvas, and it’s going to take pride of place in my new home, but for now it’s hanging in my bedroom and it looks fab.
To check out CanvasDesign’s full range of canvas sizes and services, click here. You can also get 15% off all orders using the code ‘BLOG15’!
Naomi x
* This personalised canvas was sent to me by CanvasDesign for review purposes. All opinions expressed are honest and my own.*
Dopper Water Bottle: Review and Giveaway!
17I drink a lot of water every day, especially when I’m at work, but I really begrudge paying for bottled water when you can get it for free from the kitchen tap, especially as the bottles that bottled water comes in aren’t widely recycled, so the majority end up on landfill, littering the streets or even floating around in the ‘plastic soup’ that is our oceans! As such, I have long been on the look out for a more environmentally friendly, reusable bottle, so I was extremely pleased when I discovered Dopper on Twitter.
Dopper is a Dutch product which was invented with the aim to put a stop to the damaging effects that plastic bottles have on the environment. Dopper is a unique reusable bottle which has a zero net carbon footprint, and is BPA-free, meaning that the Dopper is free of the harmful chemical usually used in plastic production.
Dopper bottles are completely sustainable, as they can be refilled and used over and over again, and promote the drinking of free, calorie-free, thirst quenching WATER! There’s even a Dopper app so you can find out where to refill your bottle for free. The brand also contribute to water projects around the world through the Dopper Foundation, with 10% of all Dopper sales going straight into the Foundation to fund the introduction of safe, clean drinking water and facilities in countries such as Nepal.
If you want to find out more about Dopper, their work and ethos, click here.
What I love about my Dopper is that it doesn’t look like a normal bottle. It has an unusual but fashionable design which is also practical, and comes in a wide range of colours. The Dopper has a wide, flat lid which, at first, seemed a little unnecessary, until I realised why… Not only does the lid unscrew, but the white section unscrews as well, so you can use it as a drinking cup if you don’t fancy drinking straight from the bottle. An absolute genius addition to an already excellent product. Luckily, both the lid and the cup screw back on securely, so there’s no need to worry about leakage.
The Dopper holds 450ml of water, just a little less than your average bottle of water from a shop, and is the ideal size to carry with you in your bag, fit into the cup holder of your car or take with you on a run or whilst exercising. I can’t express enough how much I absolutely love my Dopper. The design is so innovative and functional, but it also looks fantastic and, most importantly, it’s so much kinder on the Earth than the bottled water you buy in shops!
In fact, I believe in Dopper so much that I have something very special to share with you… I have not one, but TWO Doppers to give away to two lucky readers – a red and an orange that both really stand out from the crowd.
To enter, all you have to do is complete as many of the tasks as you want/can on the Rafflecopter form below. The competition will run for three weeks, and will end at midnight (GMT) on 26th November. The giveaway is open WORLDWIDE and all entries will be checked. The winners will be chosen at random and announced the next day, and contacted via email, and will be given 48 hours to respond with their postal address. If no reply is received within this time, another winner will be chosen at random. Good luck!
a Rafflecopter giveaway
Naomi x
Pebble Grey LED Illuminated Cosmetic Mirror
1I recently came across a great little interior design company called Pebble Grey, who specialise in contemporary mirrors and modern bathroom accessories, and they kindly sent me one of their newest products to review – an LED Illuminated Cosmetic Mirror.
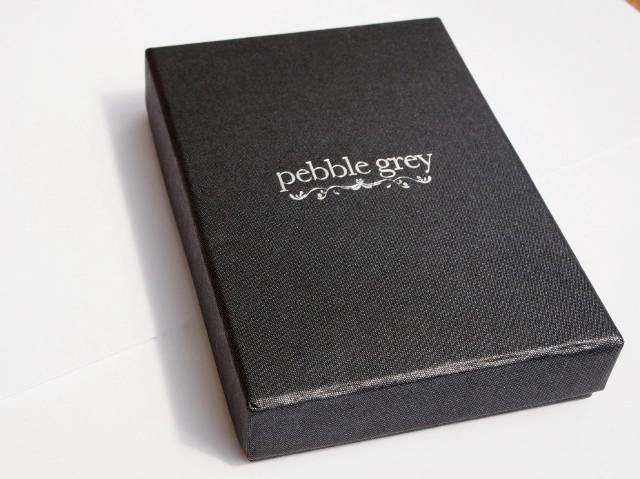
When I first received the mirror, I was instantly struck by how beautiful its packaging is. The mirror comes presented in a sleek, dark grey presentation box which feels lovely to the touch, and comes with a velvet black pouch to store it in when you’re out and about, to prevent any scratches or scuffs. It’s obvious that a lot of care and thought has been put in to the packaging, and it gives the product a luxury edge that would make it perfect as a gift idea for a loved one, or even as a treat for yourself.
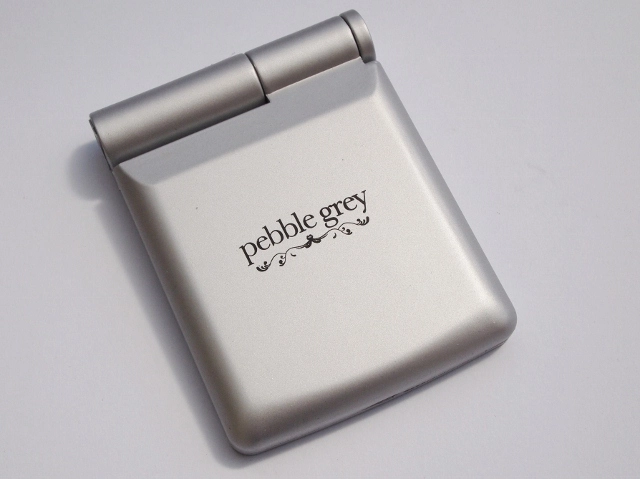

The mirror itself is matte grey in colour, and is adorned with the Pebble Grey logo on the front, and a feminine, swirly pattern on the back. It is elegantly slim, but very well made with a strong hinge, and feels very sturdy, so it won’t break easily like some cheaper pocket mirrors do.
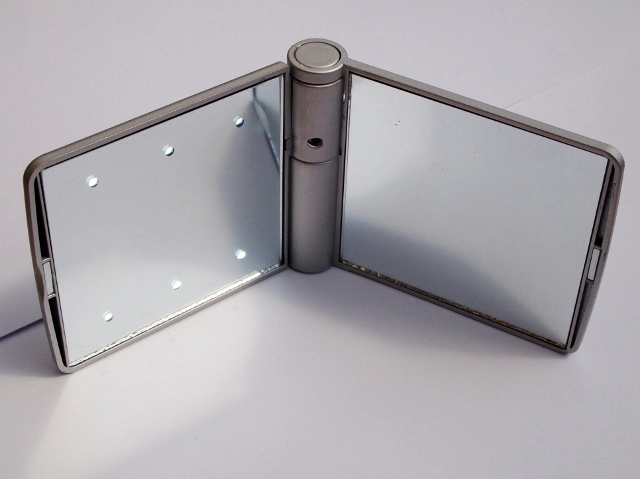
Inside the compact are two mirrors with 2x magnification, one of which is studded with six powerful LED lights. The lights are very useful and make for effortless make up application, as they highlight the areas of your face that are often in shadow, meaning you can blend your make up perfectly with no unevenness. They’re also bright enough so that you can check your face in darker areas with no trouble. My favourite use for the mirror, however, is for plucking my eyebrows, as the magnification and LED lights make it easy to see any small, stray hairs.
Pebble Grey’s Illuminated Cosmetic Mirror comes everywhere with me, and is extremely handy, and several people have asked me where they can get one. I would highly recommend it to anyone looking for a high quality, versatile mirror. The mirror usually retails for £14.99, but is currently on offer for £9.99 on the Pebble Grey website, so grab yourself a bargain whilst you still can!
Naomi x
*This LED Illuminated Cosmetic Mirror was sent to me be Pebble Grey for review purposes. All opinions expressed are honest and my own.*
Nails by AB
15A few weeks ago I was asked by Amy of Nails by AB to review a set of her gorgeous false nails. Amy is a trained beauty therapist and her new business, Nails by AB, specialises in creating personalised designer nails which are painted according to your own specifications, and then posted out to you. Having seen some of Amy’s designs on Twitter I was hugely impressed so, of course, I jumped at the chance to try some of her nails for myself. The design I asked for and swiftly received was a set of bang on trend owls.
The nails came very nicely packaged in a drawstring bag, and a handy little tube of nail glue was also provided.
This stunning owly set contains 18 nails (9 pairs of differently sized nails), so you’re guaranteed to find a complete set that fits you in amongst them. A set of 18 owl nails costs £8.50 (including UK postage), which is incredible value for money considering the amount of effort that goes in to painting them! However, if you want a smaller set (which usually costs less) Amy will ask you to measure the width of your nails upon ordering, so that she can choose, tailor and shape your nails specifically to fit you. How great is that?
As I’m sure you can tell from my photographs, the quality of these nails is excellent. The design is simple, yet really carefully and neatly painted, and the colours used are really bold. I absolutely love these little owls, they’re just so cute, and it is obvious that Amy has a real talent for nail art!
Both my sister and I have tried these nails on and we both agree that they are very comfortable. The nails themselves are made of plastic, which is thin enough to be flexible and look like a natural nail, but not too thin so that they break easily. The glue that is provided keeps the nails on for a good while (basically until you decide to take them off), so if you want your nails to last longer than just a night out, these will.
The photographs below were modelled by my sister. She has far shorter nails than me so I thought it would be a good idea to show that the nails stay put even on short nails…
The Nails by AB range features many quirky, bespoke designs, including the latest Moustache Nails which cost £9.50 a set and celebrate Movember, with £4.00 of the proceeds being donated to the Movember charity. However, Amy is more than happy to paint a set of nails to your own design if you have something specific in mind. Nails by AB nails start at £6.50 a set, but only go as high as about £10.00, which is so worth it when you consider what you’d pay for a salon manicure.
If you would like to order some pretty little nails from Nails by AB, you can do so via Amy’s website, on eBay (under nailsbyab), through the Nails by AB Facebook page, or even through the Nails by AB Twitter account. Payment can be made through PayPal or Credit/Debit Card, and once payment has cleared your nails should hopefully be in the post to you within 2-3 days, sent FREE by second class post.
Nails by AB’s products and service are top class, and it is obvious that so much care and passion is put into Amy’s work, so please help to spread the word about this nifty little company!
Naomi x
Nail Art: Halloween Pumpkins
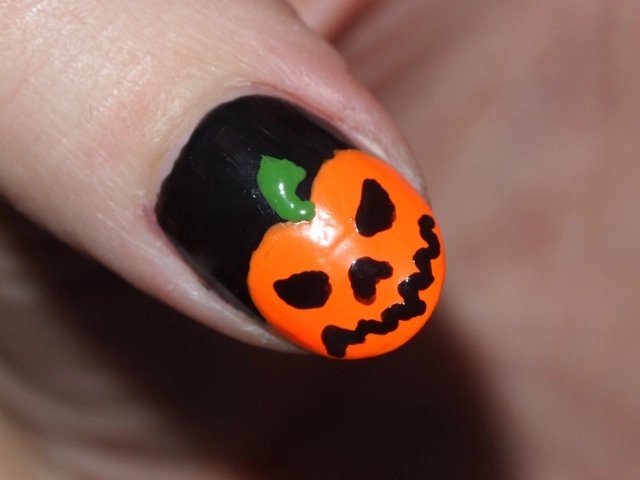
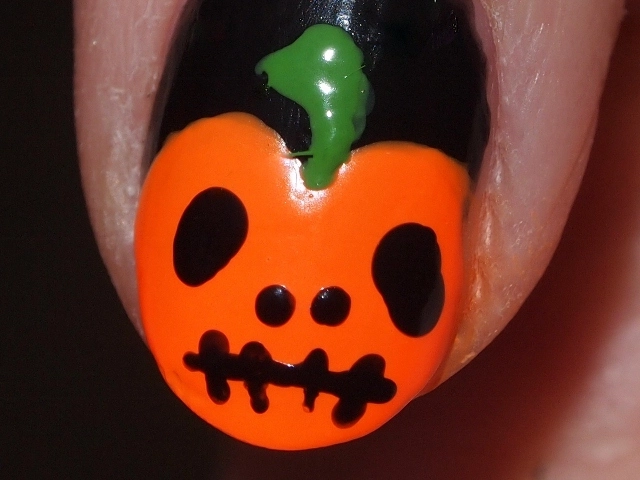
18Happy Halloween everyone! Halloween has always been one of my favourite days of the whole year, and every October 31st I love to dress up and cook up a big feast for my family and friends. This year is my first Halloween as a beauty blogger, so I thought I would create some Halloween inspired nail art to share with you all. So, here are my Halloween Pumpkins!
Aren’t they cute? The whole design took less than half an hour to do and I’m so happy with how they turned out. The colours I used to create this look are:
- Models Own ‘Orange Sorbet’
- NYC In A Minute ‘High Line Green’
- Primark ‘Black’
I hope you’ve all had a spooktacular day 
Naomi x
Monopoly Nail Art
19Today I thought I would share my latest attempt at nail art with you all, which is themed around squares on a Monopoly board! After doing my Pac-Man nail art last week, I wanted to try some more game themed designs. Monopoly is one of my favourite board games and I happened to have MUA’s Shade 5 to hand, which is very much like the colour of a Monopoly board, so it seemed only fitting for this to be my next design.
What do you think? I’m rather pleased with how they turned out, although it was VERY difficult drawing the ‘Free Parking’ car using my left hand! I’m very happy with the ‘Go’ nail though, and I think the coloured cuticles look good.
The colours I used for this design were: MUA Nail Varnish Shade 5, Avon Nailwear Pro ‘Real Red’, Avon Nailwear Pro ‘Coral Beat, Barry M Nail Paint ‘Yellow’, NYC Nail Polish ‘High Line Green’, Rimmel Pro Nail Polish ‘Fancy Fuchsia’, Primark Nail Polish ‘Black’, Primark Nail Polish ‘Blue’, Laval Nail Polish ‘White’, Technic Nail Art Pen ‘Black’ and Sally Hansen Base & Top Coat.
Naomi x
Pac-Man Nail Art
6After looking at some amazing computer game make up designs yesterday, I wanted to try my own game-inspired look. I didn’t want to do anything too complex (it was 9pm and I’d had a looong day), so I settled for nail art as I find it quite relaxing. I decided to do a basic Pac-Man design as the simple shapes are very easy to draw using nail dotting tools, and it only took five colours – black, white, red, blue and yellow. This was the finished result…
I painted Pac-Man on my index finger, Blinky the red ghost on my ring finger and the famous Pac-Man cherries on my thumb. I really enjoyed painting the cherries for some reason! I’m not completely happy with the overall look as, once again, my bed sheets left imprints on the design (someone please stop me painting my nails at night!), but I think they look cute enough. People keep telling me how much they like them anyway so I must be doing something right.
What other games would you like to see turned into nail art?
Naomi x
Nail Art: Vintage Roses
9After a week of wearing dark coloured nail varnish, I fancied something slightly more pastel today. I’d been seeing a lot of vintage floral nail art doing the rounds lately, so I thought I’d have a go myself. I used a lovely little flowery tea cup as inspiration, as you can see!
The colours I used for this are:
- Avon Nailwear Pro in ‘Vintage Blue’ (Background)
- Avon Nailwear Pro in ‘Viva Pink’ (Roses)
- Avon Nailwear Pro in ‘Pastel Pink’ (Rose Swirls)
- N.Y.C. Long-Wearing Nail Enamel in green (Leaves)
- Avon Peeling and Brittleness Solver (Base and Top Coat)
What do you think? I think it’s a great look for Spring 
Naomi x
Nail Art: The Very Hungry Caterpillar
12I recently bought a set of nail dotters on eBay, so yesterday I took a bit of time out from everything to practise using them! The Very Hungry Caterpillar was one of my favourite books as a child, and I am still just a little bit obsessed with it. I have a Caterpillar calendar, a Caterpillar mug, bowl, plate, Caterpillar toys, Caterpillar plasters, Caterpillar books, a Caterpillar bookmark… all sorts! So it seemed only natural to attempt some Caterpillar themed nails, just for fun. 90 minutes and about 12 nail varnishes later, here is how they turned out…
I have to say, I am SO pleased with the result and I’m actually really proud of this attempt! The design took about 90 minutes in total, including drying time, which I don’t think is that bad considering I did it all freehand. The nails on my other hand all have polka dot tips like my thumb and pinky in this picture. I found the dotting tools surprisingly easy to use so I didn’t have much trouble with the drawing… This is definitely a more adventurous design than my previous ones anyway! The pale blue base is Avon’s Nailwear Pro in ‘Vintage Blue’, and the Caterpillar green is MUA’s ‘Shade 13′.
I have entered my design into Avon’s ‘Perfectly Polished’ competition and so far I only have 2 votes, so if you like my nails please vote for me here! A massive thanks in advance to those that do 
What do you think?
Naomi xx
