Posts tagged Brown
Urban Decay Eyeshadow in Snakebite
8If there’s one thing I’ve noticed in the world of beauty blogging it’s that Urban Decay eyeshadow palettes are extremely popular, so much so that reviews of the palettes seem to take precedent over the brand’s single eyeshadows. So, when Lookfantastic gave me the opportunity to try an Urban Decay eyeshadow, I was intrigued to find out whether bloggers are missing out on a little gem in choosing palettes over singles.
Urban Decay’s range of eyeshadows features 68 shades in every colour you can imagine, all of which have fun, creative names. From nudes and browns, to blues, pinks, purples and even black, there’s something for everybody, so if the combined shades in the palettes aren’t for you, you can pick and choose the singles and build up a personalised collection of colours.
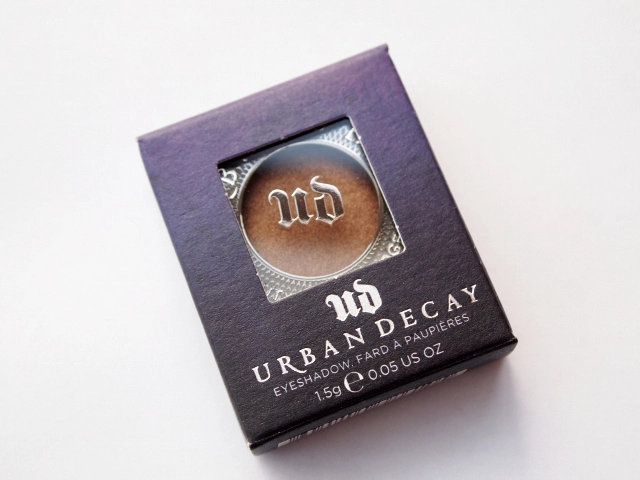
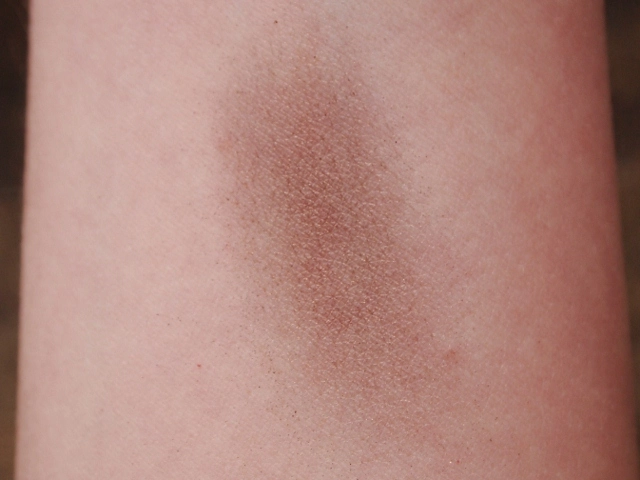
The shade I received is called Snakebite – a bronze brown with a slight shimmer which is ideal for day wear on its own.
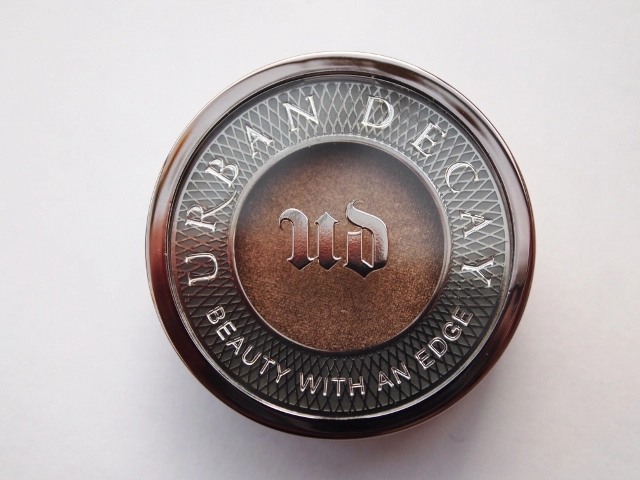
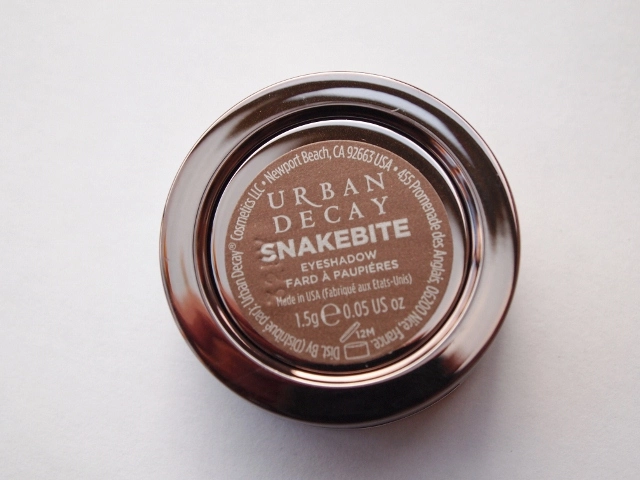
I’m a sucker for beautiful packaging (as long as the product inside lives up to it), and Urban Decay’s new design eyeshadows are definitely pleasant to look at. The shadow comes encased in a silver-toned circular pot which looks very chic, and is apparently inspired by NYC subway tokens – a brilliant cultural touch. Even the textured purple box is lovely!


The eyeshadow itself has a velvety soft feel which translates onto the skin for a flawless, smooth finish. When I first used Snakebite I was slightly worried that my eyeshadow brush wasn’t picking up much of the product, but when I applied it I was pleasantly surprised. The eyeshadow is very highly pigmented, so what looked like a little went a very long way, and it didn’t take much to build up decent coverage.
The only issue I have with the eyeshadow is that the powder sits quite loosely on the brush, meaning it makes quite a mess with the excess falling onto my cheeks during application. However, this is easily sorted with a quick sweep of a spare clean brush!
Here’s how the eyeshadow looks on the skin…
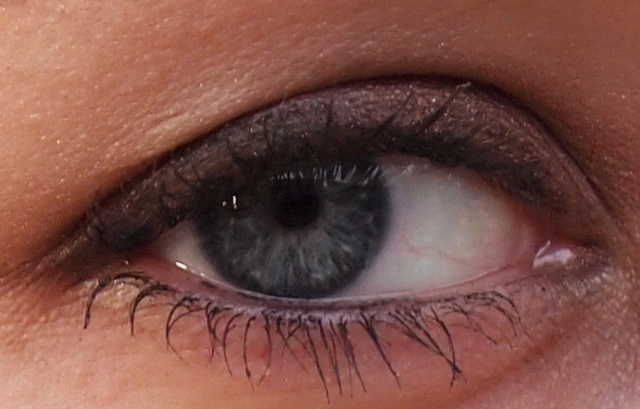
Perhaps the biggest test of a good eyeshadow is how long it lasts, and Urban Decay’s eyeshadow lasts an impressively long time. The first time I wore Snakebite I wore it without an eyelid primer, yet it still lasted all afternoon with no fading, and it didn’t gather in the creases or smudge at all. I just love that you can wear this eyeshadow without having to worry about touching it up throughout the day!
Overall, from packaging to product this little eyeshadow oozes quality and I really, really like it. If you love the Urban Decay palettes then I’d highly recommend you try the singles too! You can find the full range of Urban Decay’s gorgeous little eyeshadows here at Lookfantastic, and they cost £14.00 each.
Naomi x
*This Urban Decay Eyeshadow was sent to me by Lookfantastic/The Hut Group for review purposes. All opinions expressed are honest and my own.*
Big Birthday Giveaway WINNER
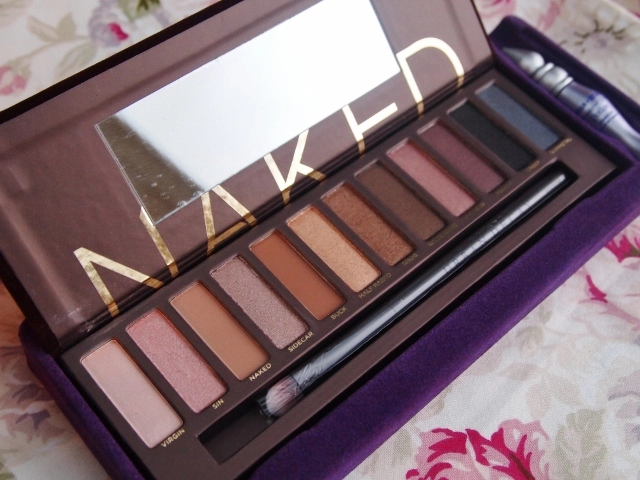
3Last month, to celebrate my 23rd birthday and my blog’s 1st birthday, I launched my Big Birthday Giveaway. I teamed up with Lookfantastic to offer one lucky winner a highly sought after Urban Decay Naked Palette, and the time has finally come for me to announce who will be receiving this amazing prize!
The response to the giveaway was incredible and by the time it closed it had received more than 2000 entries from all over the world! So, thank you so much to everyone who entered – I really appreciate your support, and thank you too to Lookfantastic for donating the palette.
Now, the moment you’ve all been waiting for. The WINNER of my Big Birthday Giveaway is Entry No. 94, which belongs to…
Chrissie Lea
Congratulations Chrissie! I hope you enjoy your prize. Please contact me at with your address to claim your prize.
Once again, thank you so much to everyone who entered – I wish I had a prize for all of you! If you still want the Urban Decay Naked Palette, it is available here from Lookfantastic for £36.00, and for a limited time, if you buy 2 Urban Decay products you will receive a free Supercurl Mascara.
Keep an eye out for another exciting giveaway coming soon!
Naomi x
Big Birthday Giveaway: Win an Urban Decay Naked Palette! – CLOSED
182Last Thursday was Bewitchery’s first birthday, and today is my 23rd birthday, so to celebrate these two special days and to say thank you to my lovely readers, I have teamed up with Lookfantastic to bring you a very exciting giveaway prize… An Urban Decay Naked Palette! The Naked Palette features twelve beautiful, neutral eyeshadow shades, a Good Karma Eyeshadow brush and mini Eyeshadow Primer Potion in Original. I’m sure you’ll all agree that this highly sought after palette is my best giveaway prize yet, and I’d like to thank Lookfantastic for donating it!
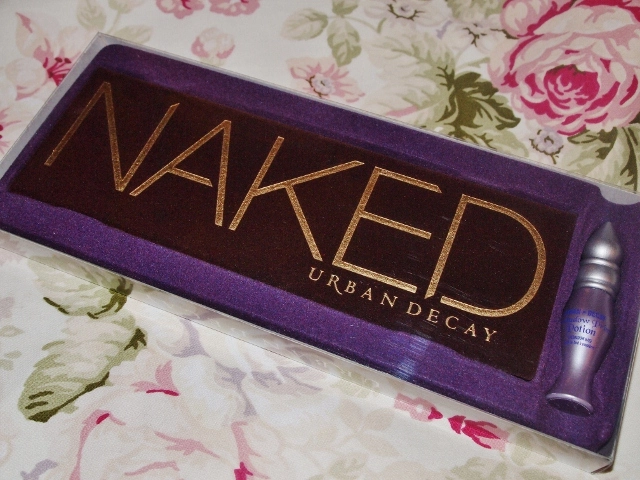

To enter, please click on the link below, and you will be taken to an entry form where you can earn as many entries as you like! Please note that to enter you must be a Bewitchery subscriber. To subscribe to my posts, please click on the ‘Follow’ button under the ‘Follow Me’ section in the sidebar. If you are not a WordPress user, you will need to enter your email address first. Thanks!
WIN AN URBAN DECAY NAKED PALETTE FROM LOOKFANTASTIC!
The giveaway is open internationally to those aged 18 or over, and will run for four weeks. The giveaway will close at midnight GMT on 14th March and a winner will be chosen at random and contacted on 15th March. You will then have 48 hours to claim your prize and message me your postal address so that I can post the palette out to you asap! If the winner does not respond within this time I will choose another winner.
Good luck to all who enter!
Naomi x
TanOrganic TryMe Set GIVEAWAY! – CLOSED
35To celebrate their launch in the UK, the lovely folks at TanOrganic have sent me not one, not two, but THREE TryMe Sets to give away to three lucky winners. Each set contains a 30ml bottle of TanOrganic Sunless Tan, a 30ml bottle of OilArganic multi-use body oil and a Self Tanning Mitt, and is worth almost €22 (£18/$29) in total. TanOrganic is BUAV approved and the only Eco certified, aloe vera based sunless tan in the whole world, and OilArganic is made from 100% natural, organic ingredients. I have tried and tested both products myself in the past (click the links above to see my reviews), and they are both top notch, so this is a really great prize and one not to be missed!
How to Enter
To be in with a chance of winning one of THREE TanOrganic TryMe Sets, you must be following this blog via WordPress or email (I will check) and you must leave a comment below! This will earn you one entry. You can also earn an extra entry for each of the following…
- Follow Bewitchery on Twitter.
- Follow TanOrganic on Twitter.
- Like Bewitchery on Facebook.
- Like TanOrganic on Facebook.
- Tweet about the giveaway saying ‘For a chance to win a @TanOrganic TryMe set, enter ’s giveaway’, with a link to this post.
And you can earn four extra entries if you reblog this post! That’s a possible ten entries in total 
The giveaway is open internationally, to anyone aged 18 or over, and will run for three weeks, ending at midnight (GMT) on the 8th of February. Winners will be chosen at random and notified via email on the 9th of February, and will be expected to provide their postal address within 24 hours. If no contact is received within this time, I reserve the right to choose another winner.
Good Luck!
Naomi x
New Hair for the New Year
28When it comes to hair I’ll admit that I’m not usually very adventurous. Throughout my teens and early twenties I have always had it long and straight, and kept my natural colour, adding a few curls, flowers or lowlights here and there, and I’ve been happy with that! However, a couple of weeks ago I found a photo of myself as a child with blonde, bobbed hair, and for some reason it made me want to change my current style. Today I finally took the plunge and I had my hair done this afternoon. I asked for a long bob, shorter at the back and graduated to a longer point at the front, with a few layers. The hairdresser mentioned that the front of my hair wasn’t quite long enough for the style I wanted, so for now I’ve had it a bit longer at the back than I’d hoped, and in a few weeks time when the front is longer I’ll have it cut into a more defined bob. She still removed a good four or five inches though!
What do you think? People keep telling me the style suits me, and it’s nice to have all the split ends removed – my hair feels so much lighter! I’m definitely happy with it and I can’t wait to have the full bob put in now. I didn’t get home until after dark so I had to use flash to get a clear photo, so I’ll take a few more tomorrow in the daylight, from different angles, to give you a better idea of how it looks.
Naomi x
Ciate Mini Mani Month Round-Up: Part 2
9Hi everyone,
Six days have already passed since my last Ciate Mini Mani Month post, can you believe it? The days are flying by and before we know it, it will soon be Christmas day! But for now, as promised, here is Part 2 of my Mini Mani Round-Up, featuring the surprises hidden behind advent calendar doors 7 to 12.

You may be pleased to know that I managed to swatch every single varnish this time, so you can get a more accurate feel for what each one is really like. As usual, they all have that deliciously creamy signature Ciate formula, which applies evenly, dries quickly and is extremely chip resistant. Here they all are in their bottles…

Day 7 – Cutie Pie

Cutie Pie is a pretty, feminine, powdery pale pink shade with a creme finish. I usually prefer bold, bright varnishes to pastels, but this one really is quite lovely and clean-looking. The above look was achieved using two coats of varnish and it’s still quite sheer, but I think three would be plenty enough for a more opaque appearance.
Day 8 – Vintage

Vintage is my favourite varnish from this week. It’s a deep grey colour, but it has a tinge of greeny blue to it which makes it more unusual than most greys. I got so many compliments about my nails on the day I wore this. I have a feeling I’ll be getting a lot of wear out of Vintage – it goes with anything!
Day 9 – Mistress

Mistress is a classic, very bright scarlet red, with a slight orange undertone and a high shine finish. I’m not the biggest fan of orange varnishes so I wasn’t too keen on this when I first saw it, but once I applied it I instantly changed my mind. I think shades like this can look a bit tacky sometimes, but because Ciate is such good quality, it actually looks really beautiful on. The only issue I have with this is that it stained my skin when I removed it! You can see evidence of the staining around my cuticles on the photo below…
Day 10 – Ladylike Luxe & Day 11 – Bumble Bee Caviar Pearls

Ladylike Luxe is a shimmery yellow gold shade, and it’s the best gold varnish I’ve ever tried. For some reason, gold and silver varnishes tend to show up any imperfections on your nails (no matter how small) and though this one isn’t perfect, it definitely disguises imperfections more than any other metal colour I’ve used. Overall this is a fab varnish – very Christmassy!
The Bumble Bee Caviar Pearls consist of two different coloured pearls – black and yellowy gold. I gave myself a ring finger mani with them yesterday, and as you can see it turned out rather well for a first attempt! The pearls were very easy to use… You just pour them over your wet nail, press them down and leave them to set for 15-20 minutes. I absolutely love how they look and feel, but they haven’t lasted very well. This morning when I woke up I noticed that the colour on the gold pearls had faded/rubbed off slightly, and after 24 hours a lot of the beads have already fallen off. I’m not sure how long they’re supposed to last, but I thought it’d be longer than a day!
Day 12 – Twilight

Last but not least, today’s varnish is Twilight – a black base with a gold fleck shimmer running through it, which also looks greeny brown depending on the light. I have a feeling this was intended to go with the Bumble Bee Caviar Pearls, and indeed it is a great match. A gorgeous, classy shade to round off the week.
Which one of this week’s minis is your favourite?
Don’t forget, you can read Part 1 of my Ciate Mini Mani Month Round-Up here. Check back next Tuesday for Part 3!
Naomi x
Chocolate Treat Week: Makeup
8My third Chocolate Treat Week post is all about make up. Believe it or not, I had to search high and low for chocolate scented and coloured make up products, but I found a couple of great ones in the end. I’ve also created a yummy eyeshadow look to share with you, which uses three different shades of chocolate brown. Enjoy!
For Lips… Palmer’s Dark Chocolate & Peppermint Lip Butter
In my high and low search for chocolate lip products I discovered a myriad of chocolate lip balms, but none of them seemed to cut the mustard as a gloss, rather than just a protective balm. In all honesty I was close to giving up, but then I found this… Palmer’s Dark Chocolate & Peppermint Lip Butter.
The Lip Butter has a lovely creamy formula which feels amazing on the lips. You can tell from how it feels that it is intensely enriching, and because it’s a butter and not a gloss it feels smooth and moisturising rather than sticky. It is also light in colour so doesn’t leave a tint on the lips, but as the packaging states it adds a ‘subtle gloss’, which is what makes it makeup in my eyes. The glossy shine it adds lasts for a long time, and can be worn over lipstick as well as directly on the lips.
The minty chocolate scent of the Lip Butter is absolutely divine. The fact that it is dark chocolate means that it isn’t too sickly sweet, and the freshness of the peppermint gives it a sharp edge. The mint also feels wonderful on the lips as it gives the lip butter a pleasant tingle. Though it doesn’t claim to be a plumping product I think it does have a slight, natural-looking plumping effect, but without the pain that some plumping glosses can cause!
Palmer’s Dark Chocolate & Peppermint Lip Butter definitely does what it says on the tin. It ‘softens & soothes lips’ almost instantly and leaves them feeling protected, but it has a big advantage over most lip balms by adding that ‘subtle gloss’. The Lip Butter is available in lots of high street shops (there’s a list here), and usually retails for about £2.75, which is an excellent price considering it is a gloss AND a protective balm in one.
For Eyes… MUA Malt Chocolate Intense Glitter Eyeliner
MUA’s Malt Chocolate Intense Glitter Eyeliner is another quality MUA product. Like all of their glitter liners it costs just £1, which is outstanding value as there’s even a pencil sharpener incorporated into the lid! The eyeliner is very creamy so it applies like a dream to both your waterlines and your upper and lower lash lines without pulling the skin at all. The glitter is very fine too, so it adds a lovely shimmer without causing any irritation or heaviness on the eye.
Malt Chocolate is a pretty, highly pigmented shade with a bronze tinge to it, which gives it that ‘intense colour finish’ – far from the dull, uninspiring look of most brown eyeliners! What I like about this liner is that, once it dries, it doesn’t smudge and it lasts a good long while before it comes off, keeping its bold colour for the duration of wear.
The eyeliner is also impressively versatile. MUA state that it can be worn all over the eyelid, as a lip liner or as an all-over lip colour as well as an eyeliner, and due to its creaminess I think it would make a great lip product as it wouldn’t be drying at all. What a fab thing to throw into your suitcase for a holiday or into your clutch on a night out!
If you’d like to try any of MUA’s Glitter Intense Eyeliners they are available in Superdrug stores or online here.
Create the Look… Triple Chocolate Eyes
The above look was created using three different shades of chocolate coloured eyeshadow. MUA’s Chocolate Box Trio Eyeshadow would be perfect for this, but I actually used their Immaculate Collection Palette. All you need to use to copy this look is a white chocolate shade as a highlighter, a milk chocolate shade as your main colour, and a dark chocolate shade for shadows and creases. The shades I used from the Immaculate Collection were these…
- White Chocolate: Shade 12
- Milk Chocolate: Shade 23
- Dark Chocolate: Shade 21
And here’s how you get the look:
- Prepare your eyelids right up to the brow bone with your preferred eye primer.
- Apply your milk chocolate shade to your eyelid using a flat eyeshadow brush, from corner to corner and up to the crease.
- Using another flat eyeshadow brush sweep your white chocolate shade above the milk chocolate shade, up to the brown bone.
- Using a shading brush, apply the dark chocolate shade along the crease of your eye, thickening the line at the outer corner and taking it down to the corner of your lashes.
- Blend the dark chocolate shade into the edge of the milk chocolate shade with a clean eyeshadow brush.
- Using a fine brush, apply a small amount of the white chocolate shade to the inside corner of your eye and a third of the way under your lower lash line. Fill in the rest of your lower lash line with the dark chocolate shade.
- Brush any loose eyeshadow from your face using a clean brush and finish with a generous coat of your favourite mascara, preferably brown.
The Last Rolo…
The Last Rolo is where I hand over the last few words of each Chocolate Treat Week blog post to another blogger. In the run up to Chocolate Treat Week I asked five of my favourite bloggers a couple of questions about their favourite chocolate treats, and today’s answers come from Claire of Nocturnal Beauty.
Can you recommend any chocolate scented, flavoured or themed beauty/fashion products?
I can definitely recommend the Whipstick lip balm from Lush. It’s my by far my favourite chocolate scented product that I’ve tried. It smells just like chocolate orange, and it isn’t overly sickly or too sweet, it smells absolutely divine. I do catch myself smelling the tin quite a lot! It feels lovely too and leaves a bit of a brown tint to the lips. It’s perfect for anybody who loves chocolate!
What is your favourite chocolate treat to eat, and why?
My favourite chocolate treat to eat is probably chocolate cake. I eat far too much cake and it’s a wonder I have any teeth left. I also make some seriously good chocolate fudge!
Thanks for reading today’s Chocolate Treat Week installment! Please check back tomorrow for a post all about chocolate themed nails, featuring some new nail art!
Naomi x
TanOrganic Sunless Tan
16A few weeks ago I was lucky enough to win a bottle of TanOrganic’s Sunless Tan and a tanning mitt in Storybook Apothecary‘s giveaway (thanks Tianna!). In all honesty, I have never been a fan of false tanning, or tanning in general, as I have pale white skin which looks absolutely ridiculous in any shade of orange, however, the ‘organic’ nature of this tanner really intrigued me. The tanner contains no synthetic ingredients, parabens, colours or scents, just natural, organic ingredients, which Tianna assured me made for a natural looking tan, even on pale skin. I couldn’t wait to try it out for myself so I used it on my legs this weekend after receiving the package on Friday.
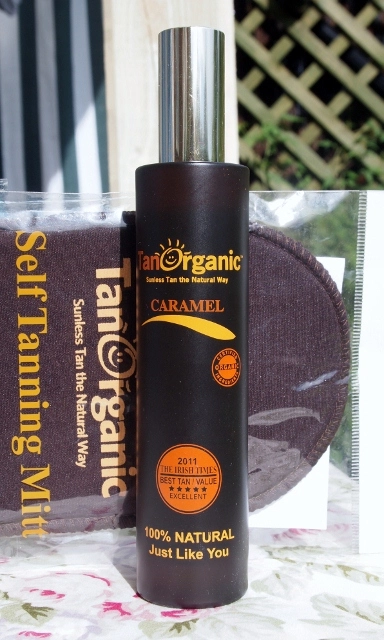
My first impressions of TanOrganic were good. The product comes in a 100ml brown glass bottle with orange and yellow detail, which I think looks a lot classier than the plastic bottles of false tan you usually see on the shelves. The mitt is a decent size too, not too small, but tight enough to fit snug to your hand so it doesn’t slip around.
The tan itself is applied with a standard pump spray which actually proved to be quite troublesome. I asked my mum to help me apply the tan (I’m an amateur at self tanning whereas she’s quite experienced) and she had some problems spraying the tan onto the mitt. She is right-handed, so she used the mitt on her right hand, which meant spraying with her left hand. The spray nozzle is quite small and difficult to press, and sometimes spins round, so it is quite difficult to press – definitely a feature that could be improved!
The bottle says that you must spray the tan onto the mitt first, and then apply it to your body in a circular motion. We followed the instructions carefully and the application was easy enough. It didn’t streak as much as I was expecting it too, but it did smudge here or there (though this is easily fixed if you rub the tan firmly to even it out). The tanner is also practically scentless. In the past, I have had the displeasure of sniffing various false tan products and they all, quite frankly, stink, but this one has an extremely delicate scent which is hardly noticeable. I put that down to the lack of chemicals, which gets it more brownie points from me.
One application to my legs used about a sixth of the bottle. I have long legs so I don’t really know if that’s a fair amount to use or not, but I imagine you could get three or four full body applications from one bottle. The bottle says to leave the tan on for six to eight hours before rinsing it off, so after applying the tan I left it to dry and then went about my business for six hours. When I rinsed the tan off the water went bright yellow, but my legs stayed looking brown as I hoped they would! As suggested, I washed with body wash and then applied moisturiser to help prolong the tan.
Now, here are the before and after photographs of my legs. The light looks different in both of them due to the direction of the sun at the time of taking the pictures, but I assure you they give an accurate representation of the differences!
BEFORE
AFTER
As you can see, my legs were very pale before. Though the tan didn’t give my legs an intense colour, it did make them look nicely, naturally tanned and lightly brown, and I am very pleased with the results. There are no orange blotches or dirty looking streaks in sight, and my skin tone looks very even and smooth. The difference is only minor, but it is noticeable, and that is what I wanted so it has done its job well in my opinion. In fact, I like this delicately tanned look and I’m pleasantly surprised that I do!
The phrase on the front of the bottle, ‘100% Natural Just Like You’, really sums this product up well. The formula is 100% natural (and registered as cruelty free, vegan and 95% organic), and the resulting tan looks natural – I will definitely be using TanOrganic again, I’m a convert. If you want to try it, TanOrganic’s Sunless Tan is available to purchase online from TanOrganic’s website, and costs a reasonable €19.99 (around £16, or $25) with a free Tan-Erase, or you can get it for free if you purchase their OilArganic for the same price. The mitt is sold separately for €4.99/£4/$6.25.
What do you think of the results?
Naomi x


